Tired of echoes and poor sound quality in your home or studio? Acoustic panels can transform your space into a serene and acoustically optimized environment. But where do you start?
In this blog post, we’ll guide you through the process of installing acoustic panels, from choosing the right panels to mastering the installation techniques. Whether you’re a DIY enthusiast or seeking professional advice, this comprehensive guide will equip you with the knowledge and confidence to tackle your acoustic project.
Let’s get started on creating a space that sounds as good as it looks!
How to Put Up Acoustic Panels

Understanding Your Space
Before you start hammering nails, it’s crucial to understand your room’s acoustics.
- Identify problem areas: Determine where echoes, reverberations, or standing waves are most noticeable. This will help you strategically place your acoustic panels.
- Measure your space: Accurately measure the walls and ceiling where you plan to install the panels. This will help you determine the number and size of panels needed.
- Consider panel types: Acoustic panels come in various materials and thicknesses. Some are designed for absorption, while others are for diffusion. Choose the type that best suits your needs.
Choosing the Right Panels
The type of panel you select will depend on your specific requirements and aesthetic preferences.
- Acoustic foam panels: These are popular for their affordability and ease of installation. They come in various shapes, sizes, and colors.
- Fabric-wrapped panels: These offer a more elegant look and can be customized with different fabrics. They often provide better sound absorption than foam panels.
- Wood slat panels: These combine aesthetics with acoustics, offering both sound absorption and diffusion.
Tools and Materials
Gather the necessary tools and materials before starting the installation.
- Acoustic panels: Choose the size, shape, and quantity based on your room’s dimensions and acoustic needs.
- Adhesive: Many panels come with pre-attached adhesive strips, but you might need additional adhesive for a secure hold.
- Measuring tape: Ensure accurate measurements for panel placement.
- Level: For precise panel alignment.
- Utility knife: To trim panels if necessary.
- Safety glasses and gloves: Protect yourself during installation.
Installation Steps for Putting Up Acoustic Panels
Step 1. Prepare the Surface
- Clean thoroughly: Remove dust, dirt, or any other debris from the wall or ceiling surface. This ensures optimal adhesion.
- Fill any gaps: If there are any holes, cracks, or imperfections, fill them with spackle or caulk. Allow the filler to dry completely before proceeding.
- Prime the surface (optional): For better adhesion and a more even finish, consider priming the surface, especially if you’re dealing with a textured wall.
Step 2. Plan Your Layout
- Visualize the placement: Consider the room’s dimensions, furniture arrangement, and the specific areas where sound issues occur. This will help you determine the best placement for your panels.
- Create a layout: Sketch a basic outline of the room and mark where you plan to install the panels. This will give you a visual guide during installation.
- Measure accurately: Use a measuring tape to determine the exact dimensions of the wall or ceiling area where the panels will be placed.
Step 3. Attach the Panels
- Choose the right adhesive: Most acoustic panels come with self-adhesive strips, but you can also use construction adhesive or mounting brackets. The choice depends on the panel material, wall type, and desired level of permanence.
- Follow manufacturer‘s instructions: Each panel type may have specific installation guidelines. Carefully read and follow these instructions.
- Apply adhesive evenly: If using construction adhesive, apply a thin, even layer to the back of the panel. Avoid excessive amounts to prevent sagging.
- Position the panel: Carefully align the panel with the desired location on the wall or ceiling. Use a level to ensure it’s straight.
- Press firmly: Apply firm pressure to the panel to ensure good adhesion. If using mounting brackets, secure them tightly.
Step 4. Secure the Panels (if necessary)
- Additional support: For larger panels or areas with high humidity, consider adding additional support, such as nails or screws, to prevent the panels from falling.
- Concealment: If using nails or screws, choose fasteners that match the panel color or use panel covers to hide them.
Step 5. Final Adjustments
- Check for evenness: Inspect the installed panels to ensure they are evenly spaced and aligned.
- Make adjustments: If necessary, gently reposition the panels to achieve the desired look and acoustic performance.
Remember: Patience is key during the installation process. Take your time to ensure accurate placement and secure attachment for optimal results.
Tips for Optimal Results
- Cover problem areas: Focus on areas with the most significant acoustic issues.
- Combine absorption and diffusion: Use a combination of panels for the best results.
- Consider panel thickness: Thicker panels generally offer better sound absorption.
- Experiment with placement: Don’t be afraid to experiment with different panel arrangements.
By following these steps and considering the tips, you can effectively improve the acoustics of your space and enjoy a more pleasant listening experience.
How to Put Acoustic Panels on the Wall

Here’s a step-by-step guide on installing acoustic panels on your wall:
Materials Needed:
- Acoustic panels
- Adhesive strips or construction adhesive
- Level
- Pencil
- Measuring tape
- Safety glasses and gloves
Installation Steps:
- Prepare the Wall:
- Clean the wall surface to ensure proper adhesion.
- Fill any holes or cracks with spackle and let it dry completely.
- Plan the Placement:
- Determine the optimal placement of your panels based on your room’s acoustics and desired aesthetic.
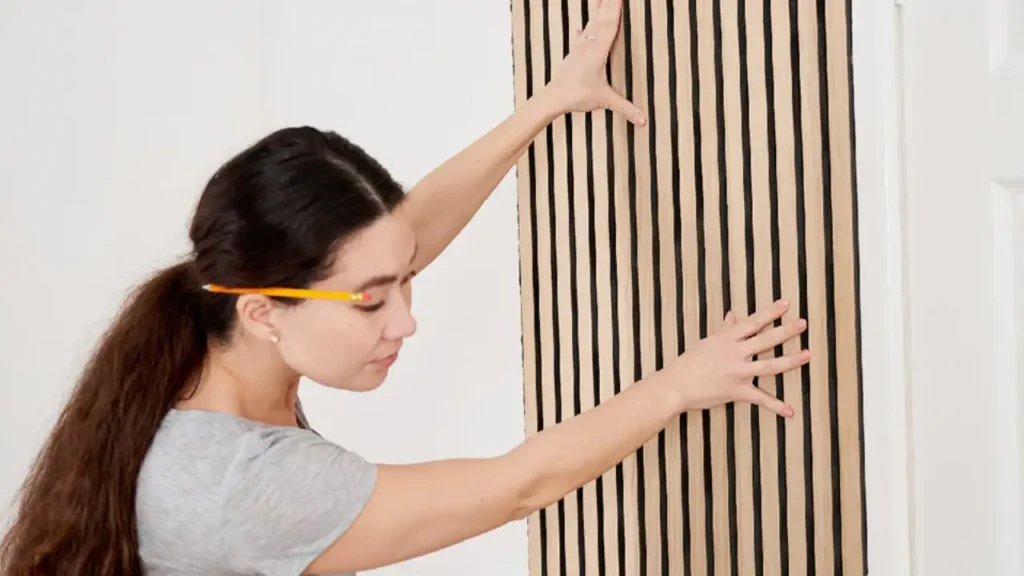
- Use a level and pencil to mark the desired positions on the wall.
- Choose Your Attachment Method:
- Adhesive strips: Most acoustic panels come with pre-attached adhesive strips. Peel off the backing and firmly press the panel onto the wall.
- Construction adhesive: Apply a thin, even layer of construction adhesive to the back of the panel. Carefully position the panel on the wall and press firmly.
- Mounting brackets: For heavier panels or more permanent installations, use mounting brackets. Drill holes in the wall, insert anchors, and screw in the brackets. Attach the panels to the brackets.
- Level and Secure:
- Use a level to ensure the panels are straight.
- If using adhesive, apply additional pressure to ensure a strong bond.
- If using mounting brackets, tighten the screws securely.
Additional Tips:
- Start in a corner: This can help create a symmetrical look.
- Work from top to bottom: This can make it easier to align the panels.
- Cut panels if necessary: Use a utility knife or saw to carefully cut panels to fit specific spaces.
- Consider panel thickness: Thicker panels generally offer better sound absorption.
Remember: Safety first! Wear safety glasses and gloves when handling tools and adhesives.
By following these steps, you can effectively install acoustic panels on your walls and improve the sound quality of your space.
Where to Put Acoustic Panels?

Here are some best places to put acoustic panels in the following. The optimal placement of acoustic panels depends on the specific room and its intended use. However, there are some general guidelines:
Key Areas for Acoustic Panel Placement:
- First Reflection Points: These are the points on the walls where sound directly bounces off your speakers and reaches your ears. Placing panels here can significantly reduce echoes and improve sound clarity.
- Corners: Corners are prone to bass buildup. Placing bass traps (a type of acoustic panel) in corners can help control low-frequency issues.
- Behind Speakers: Acoustic panels behind your speakers can help to reduce reflections and improve soundstage.
- Ceiling: Treating the ceiling can help to control reverberation and improve overall sound balance.
Specific Room Considerations:
- Home Theater: Focus on the listening area, first reflection points, and the area behind the speakers.
- Recording Studio: Treat all walls, ceilings, and corners for optimal sound isolation and absorption.
- Home Office: Prioritize areas where you spend the most time, such as behind your desk and on walls adjacent to noisy areas.
- Living Room: Balance aesthetics with acoustics. Consider placing panels strategically to reduce echo and improve sound quality without compromising the room’s appearance.
Additional Tips:
- Experimentation: Don’t be afraid to experiment with different panel placements to find the best results for your room.
- Combine Absorption and Diffusion: Using a combination of acoustic panels and diffusers can create a balanced acoustic environment.
- Consider Room Size and Shape: Larger rooms may require more panels than smaller rooms. Room shape can also influence panel placement.
Remember: Acoustic treatment is often an iterative process. You may need to adjust the placement of your panels over time to achieve the desired sound quality.
Can You Put Acoustic Panels on Ceiling?


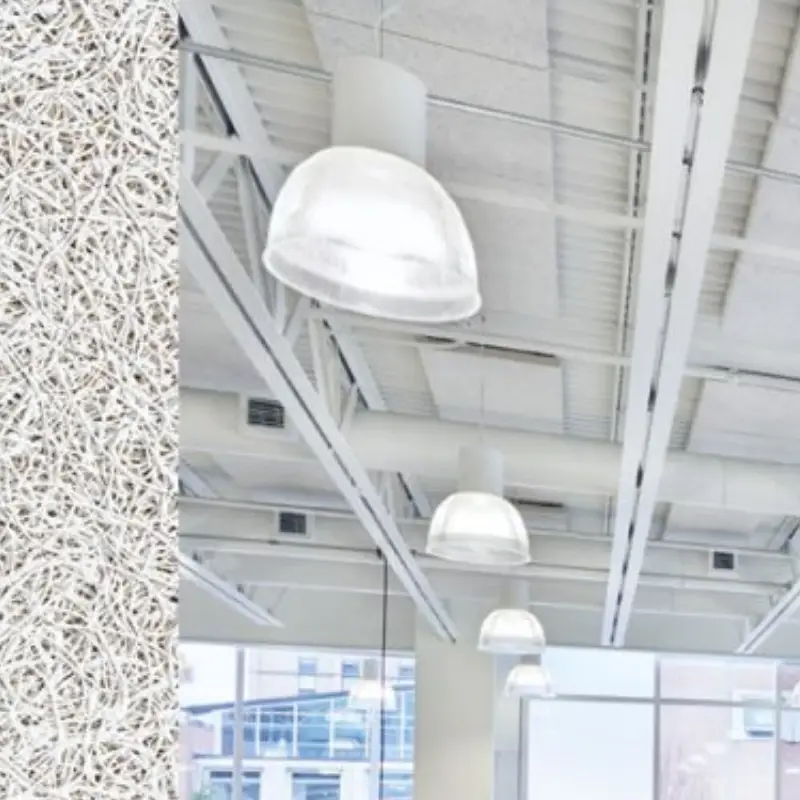

Yes, You Can Put Acoustic Panels on the Ceiling!
Installing acoustic panels on your ceiling can be a highly effective way to improve sound quality. The ceiling is a large reflective surface, so treating it can significantly reduce echoes and reverberation.
Methods for Ceiling Installation:
- Adhesive: For lightweight panels, you can use a strong, construction-grade adhesive. Ensure the ceiling surface is clean and dry before application.
- Mounting Brackets: For heavier panels or more permanent installations, use mounting brackets. These are typically attached to the ceiling joists and provide a sturdy support system.
- Suspension System: This method involves hanging the panels from the ceiling using wires or chains. It’s often used for larger panels or in spaces with high ceilings.
Important Considerations:
- Ceiling Height: Consider the height of your ceiling when choosing installation methods.
- Panel Weight: The weight of the panels will determine the appropriate installation method.
- Ceiling Material: Different ceiling materials (drywall, plaster, etc.) may require specific installation techniques.
Can You Put Acoustic Panels on Windows?
While you can technically put acoustic panels on a window, it’s generally not an effective way to improve sound insulation.
Here’s why:
- Acoustic panels are designed to absorb sound within a room, not to block it from entering.
- Windows are a primary source of noise transmission. To effectively reduce noise from outside, you need to address the window itself, not just what’s on the inside.
Better options for soundproofing windows include:
- Acoustic window inserts: These fit inside your existing window frame and provide a noticeable reduction in noise.
- Thick curtains: While not as effective as acoustic inserts, heavy, dense curtains can help to absorb some sound.
- Weatherstripping: Sealing gaps around your windows can prevent outside noise from entering.
- Double or triple-pane windows: Replacing your windows with more energy-efficient options can significantly reduce noise.
If you’re looking to improve the acoustics within a room with windows, it’s better to focus on treating the walls and ceiling with acoustic panels.
Conclusion
Installing acoustic panels can significantly enhance the sound quality of your room, whether it’s a home theater, recording studio, or home office. By following the steps outlined in this guide, you can achieve optimal results and create a more enjoyable listening experience.
Remember, proper placement and panel selection are crucial for effective sound treatment. If you’re unsure about the best approach for your space, consider consulting with an acoustic professional.
Ready to transform your room with premium acoustic panels? Contact us today for a free quote and expert advice. Our team is dedicated to helping you achieve the perfect sound environment.