Have you finally finished crafting your acoustic panels and are ready to transform your space? Great! Installing them correctly is crucial to maximizing their sound-absorbing potential.
This blog post will guide you through the step-by-step process of installing your DIY acoustic panels. Whether you aim to enhance your home theater, recording studio, or office acoustics, you’ll find valuable tips and tricks to ensure a successful installation.
Get ready to:
- Learn about different installation methods
- Discover the best placement for optimal results
- Explore tips for a seamless and professional finish
Let’s get started on turning your acoustic panels into a sound-absorbing masterpiece!
How to Install Acoustic Panels?
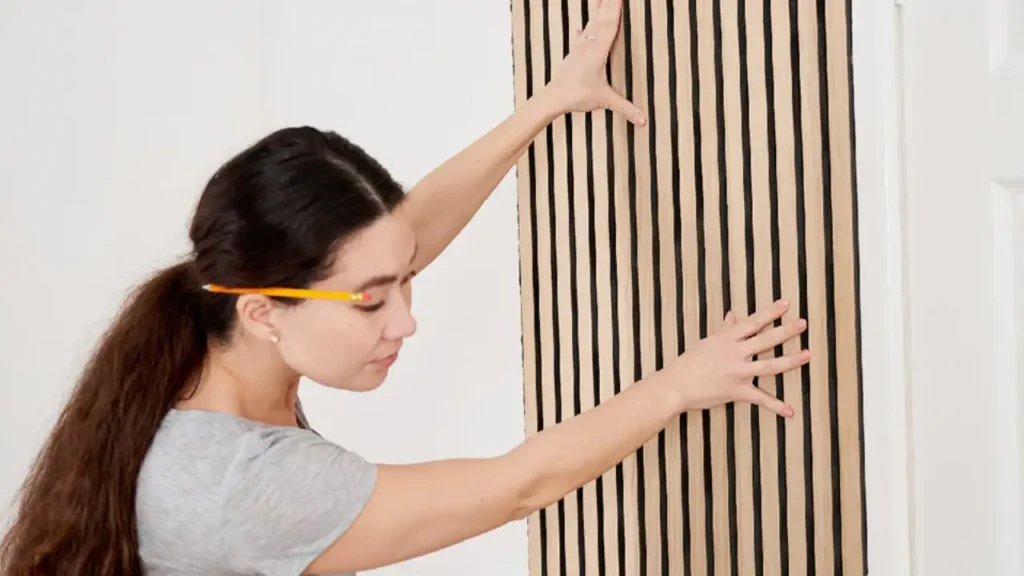
Installing acoustic panels is a relatively straightforward process that can significantly enhance your room’s acoustics. Here’s a general guide:
Tools and Materials:
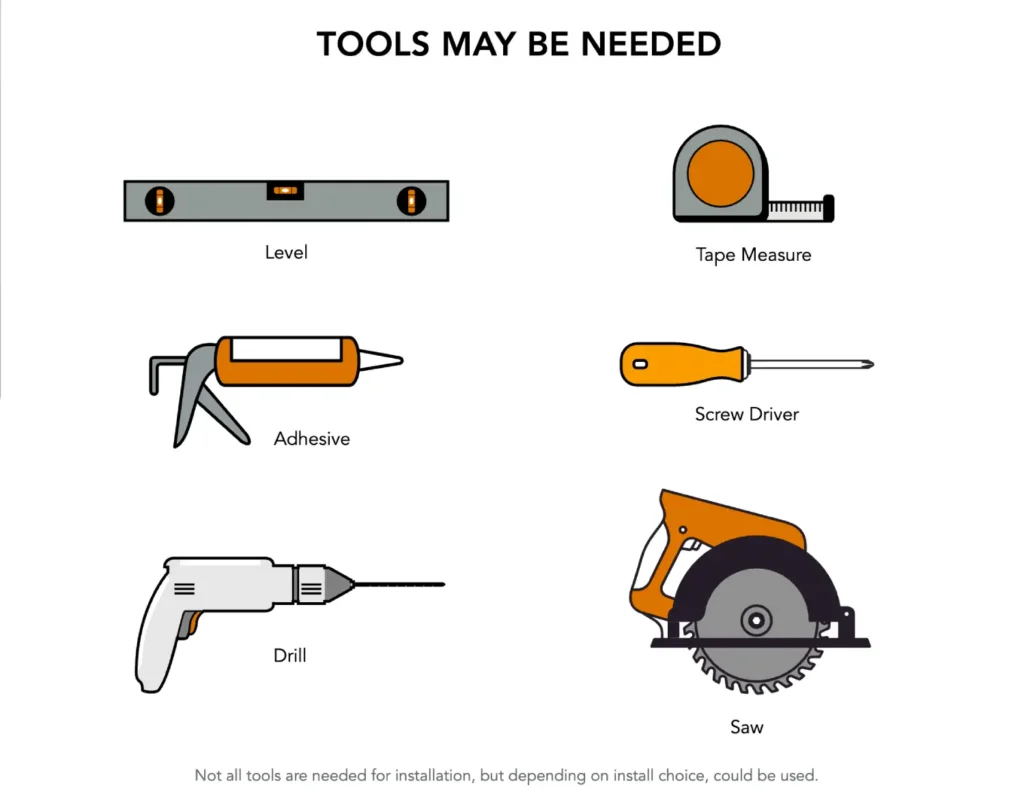
- Level
- Pencil
- Measuring tape
- Drill
- Screws or nails
- Wall anchors (if necessary)
- Adhesive (optional)
Steps for installing acoustic panels in the following:
Step 1: Plan Your Placement:
- Identify the areas in your room that suffer from echo or reverberation. These are typically large, flat surfaces like walls and ceilings.
- Consider the aesthetics of your room. You might want to create a symmetrical pattern or focus on specific areas.
Step 2: Measure and Mark:
- Measure the dimensions of your acoustic panels.
- Use a level and pencil to mark the desired positions on your walls or ceiling. Ensure the panels are evenly spaced.
Step 3: Prepare the Surface:
- Ensure the surface is clean and dry.
- If you’re installing on drywall, use a stud finder to locate wall studs for added support.
Step 4: Choose Your Installation Method:
- Adhesive: Apply a strong construction adhesive to the back of the panel. This method is suitable for lightweight panels and flat surfaces.
- Screws or Nails: Drill pilot holes into the wall and secure the panels with screws or nails. Use wall anchors if necessary.
- Hanging System: Some acoustic panels come with pre-attached hanging systems. Follow the manufacturer‘s instructions for installation.
Step 5: Install the Panels:
- Carefully position the panel on the marked area.
- If using adhesive, press firmly to ensure a good bond.
- If using screws or nails, drive them in securely.
Additional Tips:
- For larger panels or heavier materials, consider using multiple attachment points for added support.
- If you’re unsure about the installation process, consult the manufacturer‘s instructions or seek professional help.
- Experiment with different panel placements to achieve optimal acoustic results.
Acoustic Panel Handling Tips
Here are 8 hacks that you need to know before installing acoustic panels.
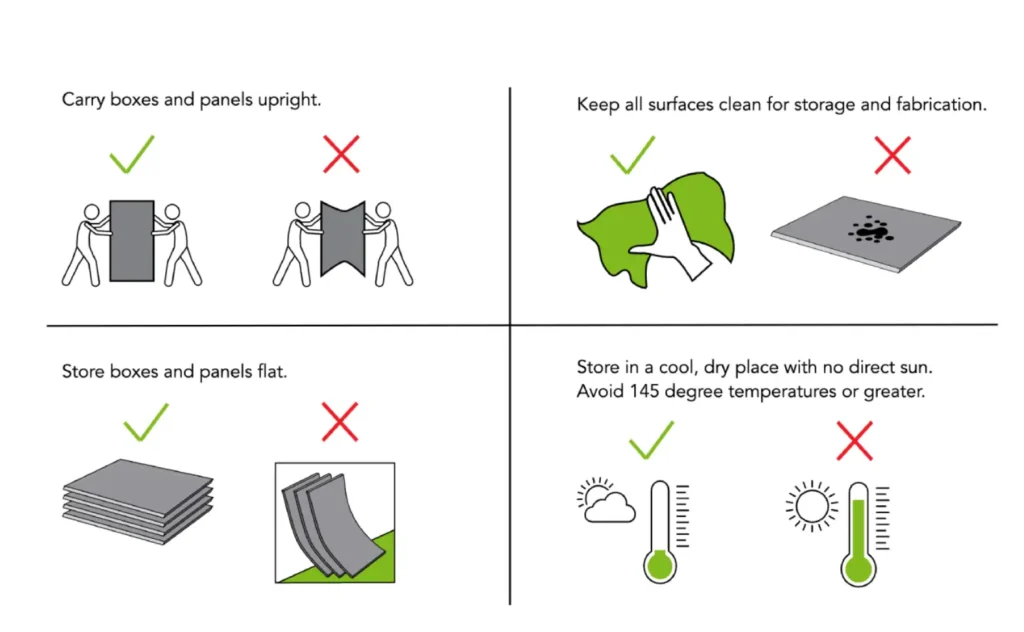
1. Carry Boxes and Panels Upright
- Prevent Damage: Carrying boxes and panels upright helps to prevent damage to the edges and corners, which can affect their appearance and performance.
- Maintain Structural Integrity: Maintaining the upright position helps to preserve the structural integrity of the panels, ensuring optimal sound absorption.
2. Store Boxes and Panels Flat
- Prevent Warping: Storing boxes and panels flat helps to prevent warping, which can affect the panel’s shape and performance.
- Protect Surfaces: Storing panels flat protects the surfaces from scratches and other damage.
3. Keep All Surfaces Clean for Storage and Fabrication
- Maintain Absorption Efficiency: Clean surfaces ensure that the acoustic panels can absorb sound waves effectively.
- Prevent Contamination: Removing dirt and debris prevents contamination, which can affect the panel’s performance and longevity.
4. Store in a Cool, Dry Place with No Direct Sun
- Avoid Moisture Damage: Moisture can cause warping, mold, and mildew, which can damage the panels.
- Protect from Heat Damage: Excessive heat can cause the panels to warp or degrade, affecting their performance and appearance.
- Avoid Extreme Temperatures: Temperatures above 145 degrees Fahrenheit can significantly damage the panels, so it’s essential to store them in a cool environment.
By following these tips, you can help to ensure the longevity and performance of your acoustic panels. Proper storage and maintenance will help to protect your investment and maintain the quality of your acoustic treatment.
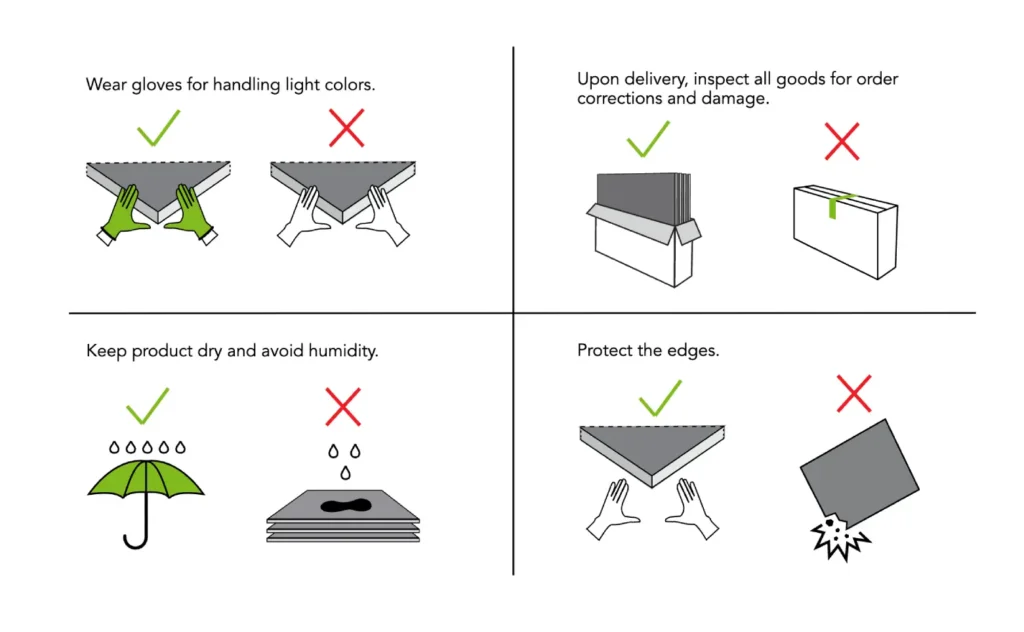
5. Wear Gloves for Handling Light Colors:
- Prevent smudges and fingerprints: Light-colored acoustic panels can easily show smudges and fingerprints, which can detract from their appearance.
- Protect the surface: Wearing gloves helps to keep the surface of the panels clean and free from contaminants.
- Maintain a professional look: Gloves can help to ensure that the panels look their best when installed.
6. Keep Product Dry and Avoid Humidity:
- Prevent warping and damage: Exposure to moisture can cause acoustic panels to warp or become damaged.
- Maintain sound-absorbing properties: High humidity can affect the sound-absorbing properties of the panels, potentially reducing their effectiveness.
- Store in a dry environment: Store panels in a dry place, away from moisture sources like bathrooms or basements.
7. Upon Delivery, Inspect All Goods for Order Corrections and Damage:
- Verify accuracy: Double-check that the order you received matches the order you placed.
- Identify any damage: Inspect the panels for any signs of damage, such as cracks, dents, or scratches.
- Report issues promptly: If you find any issues, contact the supplier immediately to resolve the problem.
8. Protect the Edges:
- Prevent fraying and damage: The edges of acoustic panels can be susceptible to fraying or damage over time.
- Use protective edging: Consider using protective edging or trim to reinforce the edges of the panels and prevent damage.
- Maintain a professional appearance: Protected edges can help to maintain a polished and professional look.
How to Install Acoustic Foam Panels on Ceiling?
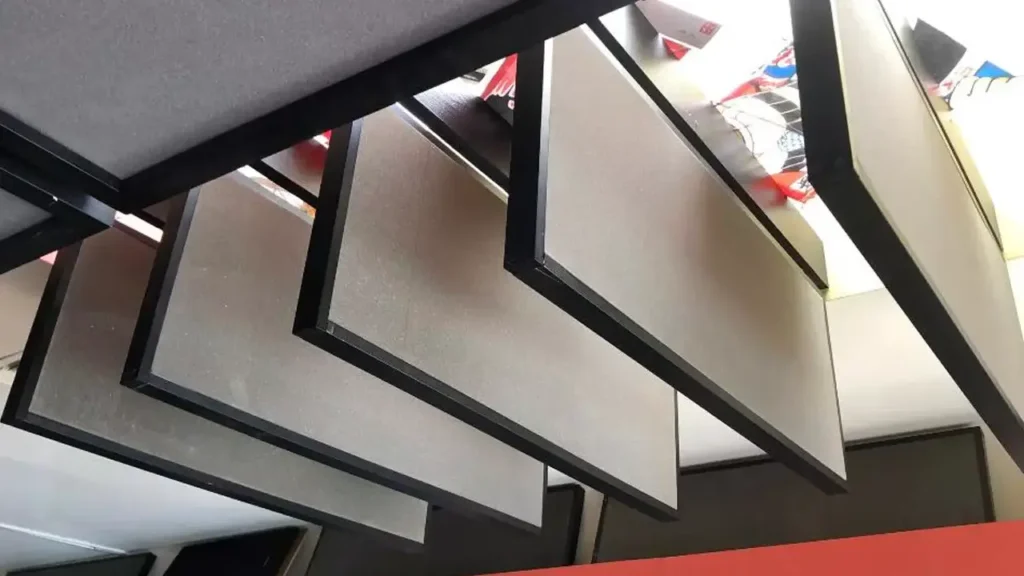
Installing acoustic foam panels on your ceiling can be a great way to reduce echoes and improve sound quality. Here’s a step-by-step guide:
Materials Needed:
- Acoustic foam panels
- T-shaped carpet pins or upholstery pins
- Level
- Pencil
Steps:
- Plan Your Placement: Determine where you want to place the foam panels on your ceiling. Consider the size of the panels and the overall aesthetic you want to achieve.
- Prepare the Ceiling: Ensure the ceiling is clean and free of any debris.
- Mark the Positions: Use a pencil and level to mark the desired locations for the foam panels on the ceiling.
- Install the Panels:
- For lightweight foam panels, T-shaped carpet pins or upholstery pins are often sufficient. Push the pin through the foam and into the ceiling.
- For heavier panels, you might need to use stronger adhesives or mounting brackets. However, be cautious as excessive weight on the ceiling can cause damage.
- Adjust and Secure: Ensure the panels are evenly spaced and securely attached.
Tips:
- For larger panels or heavier foam, consider using construction adhesive or mounting brackets for added support.
- If you’re concerned about damaging your ceiling, test the adhesive or mounting method on a small area first.
- For optimal sound absorption, consider covering a significant portion of your ceiling with acoustic foam panels.
Remember: Always follow the specific instructions provided with your acoustic foam panels.
By following these steps, you can effectively install acoustic foam panels on your ceiling and enjoy the benefits of improved sound quality.
Mounted Acoustic Panel Installation
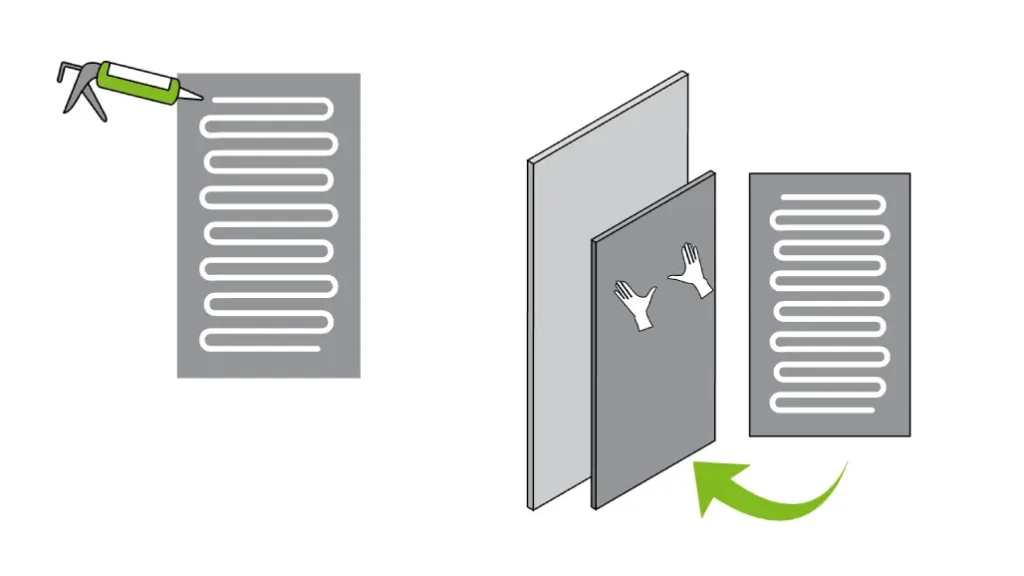
Step 1: Prepare the Surface and Apply Adhesive
- Clean the surface: Ensure the wall surface is clean, dry, and free of any dust, dirt, or grease.
- Spread adhesive evenly: Apply a generous amount of adhesive evenly to the back of the acoustic panel, leaving a 2-inch space around the edges. This will help prevent the adhesive from oozing out and creating a mess.
Step 2: Adhere to the Wall and Maintain Pressure
- Align the panel: Carefully align the panel with the desired location on the wall, ensuring it is level and straight.
- Apply pressure: Press the panel firmly against the wall, maintaining even pressure throughout the entire surface.
- Follow adhesive instructions: Refer to the adhesive manufacturer‘s instructions for the recommended curing time and pressure requirements.
- Clean excess adhesive: Once the adhesive has cured, carefully remove any excess adhesive with a damp cloth or scraper.
Note: For a more secure installation, consider using additional fasteners, such as screws or nails, in conjunction with the adhesive. However, be sure to follow the manufacturer‘s guidelines for appropriate fastening methods and materials.
Furring Strip Acoustic Panel Installation
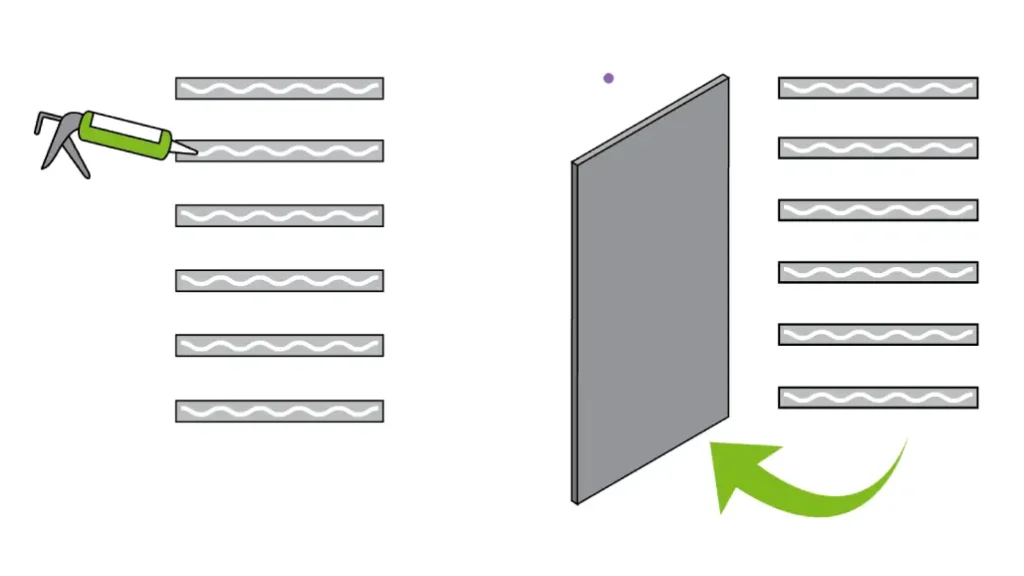
Step 1: Clean and Prepare the Surface
- Remove any obstructions: Ensure the surface is free of dust, dirt, grease, or other contaminants.
- Follow adhesive guidelines: Consult the adhesive manufacturer‘s instructions for specific surface preparation requirements.
- Spread adhesive evenly: Apply a generous amount of adhesive onto the 3-inch furring strips.
Step 2: Place Furring Strips
- Determine spacing: The recommended spacing for furring strips is 6-18 inches, depending on the expected impact on the panels.
- Secure furring strips: Press the furring strips firmly onto the prepared surface, ensuring they are level and evenly spaced.
- Allow adhesive to set: Give the adhesive sufficient time to set according to the manufacturer‘s instructions.
Step 3: Install Acoustic Panels
- Position panels: Align the acoustic panels with the furring strips.
- Secure panels: Use appropriate fasteners, such as screws or nails, to secure the panels to the furring strips. Ensure the fasteners are driven into the center of the panel to prevent damage.
- Check alignment: Verify that the panels are level and evenly spaced.
Additional Tips:
- Consider panel weight: For heavier panels, use thicker furring strips or additional fasteners for added support.
- Seal gaps: If there are any gaps between the panels and the wall, use a sealant or caulk to prevent sound leakage.
- Consult professional advice: If you are unsure about the installation process or have specific requirements, consult a professional for guidance.
By following these steps and considering the additional tips, you can effectively install acoustic panels using furring strips to improve the acoustics of your space.
Z-clips Acoustic Panel Installation
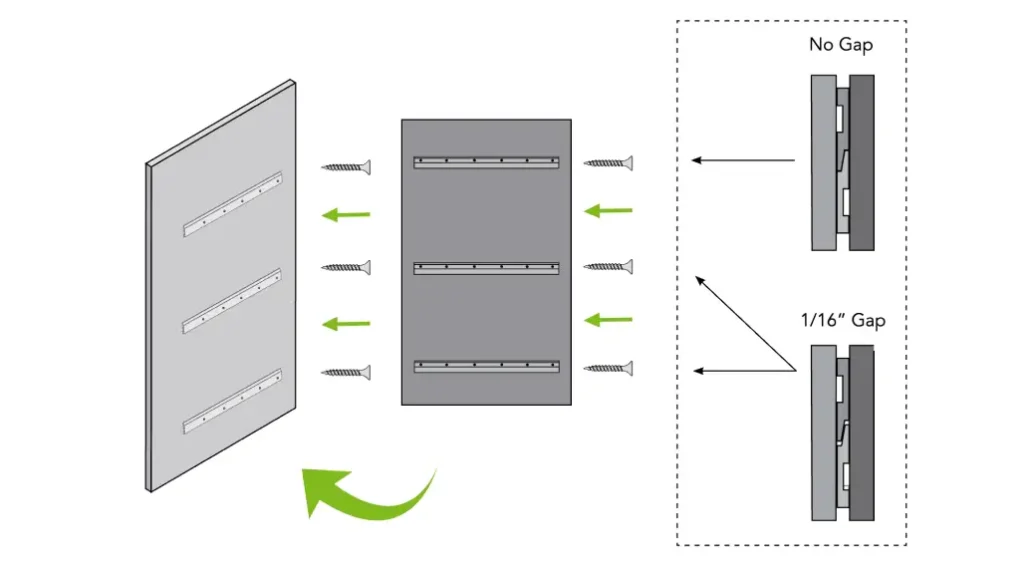
Step 1: Preparation
- Clean the Surface: Ensure the wall surface is clean, dry, and free of any debris or imperfections.
- Mount Z-Clips:
- Attach Z-clips evenly spaced vertically on both the acoustic panel and the wall.
- Place the top Z-clips 4-6 inches from the top of the panel and wall.
- Use multiple Z-clips spaced regularly to provide adequate support, especially for panels that may experience impact.
- For PET panels, consider using full-width Z-clips for added support.
- To prevent panels from bowing, support the panel’s weight from the top full-width Z-clip.
- Leave a 1/16-inch gap between the middle and bottom Z-clips to allow for panel flex.
Step 2: Install Horizontal Strips
Add Support: Place horizontal strips every 6-18 inches along the back of the acoustic panel, depending on the expected level of impact.
- For areas with high impact potential (e.g., near doors, hallways), use a smaller spacing (6 inches).
- For areas with lower impact potential, a larger spacing (18 inches) may suffice.
Additional Tips:
- Measure Accurately: Ensure accurate measurements to ensure the panels fit properly and the Z-clips are evenly spaced.
- Use Appropriate Tools: Use a level, measuring tape, and appropriate screws or adhesives for secure installation.
- Follow Manufacturer‘s Instructions: Refer to the specific instructions provided by the acoustic panel manufacturer for any additional guidelines or recommendations.
- Consider Aesthetics: If desired, you can choose Z-clips that match the color or finish of your acoustic panels to maintain a cohesive appearance.
By following these steps and incorporating additional tips, you can effectively install your acoustic panels using Z-clips and create a quieter, more acoustically balanced environment.
Would you like me to provide more information or address any specific questions you have about acoustic panel installation?
Conclusion
Installing acoustic panels can significantly enhance your room’s acoustics and overall listening experience. By following the steps outlined above and avoiding common mistakes, you can achieve professional-looking results.
However, if you prefer a hassle-free installation or desire expert advice on panel placement and selection, our team of acoustic professionals is here to assist you. We offer premium acoustic panels tailored to your specific needs and provide professional installation services.
Contact us today for a free quote and consultation. Let us help you create the perfect acoustic environment for your space.
