Tired of dealing with echoes and poor sound quality? Building your own acoustic panels can be a rewarding and cost-effective solution. This guide will walk you through the process of creating professional-grade panels for your home or studio.
Whether you’re a music enthusiast, podcaster, or simply looking to improve your home theater experience, this DIY project can transform your space.
Let’s get started!
How to Build Acoustic Panels?
Materials Needed:
- Wood: 1×2 or 1×3 inch lumber for the frame
- Acoustic foam or mineral wool: The sound-absorbing material
- Fabric: For covering the panel (choose a breathable fabric)
- Staple gun and staples
- Wood glue
- Measuring tape
- Saw
- Drill
Step-by-Step Guide for Building Acoustic Panels:
- Determine Panel Size: Decide on the dimensions of your panels based on your room’s size and the area you want to cover.
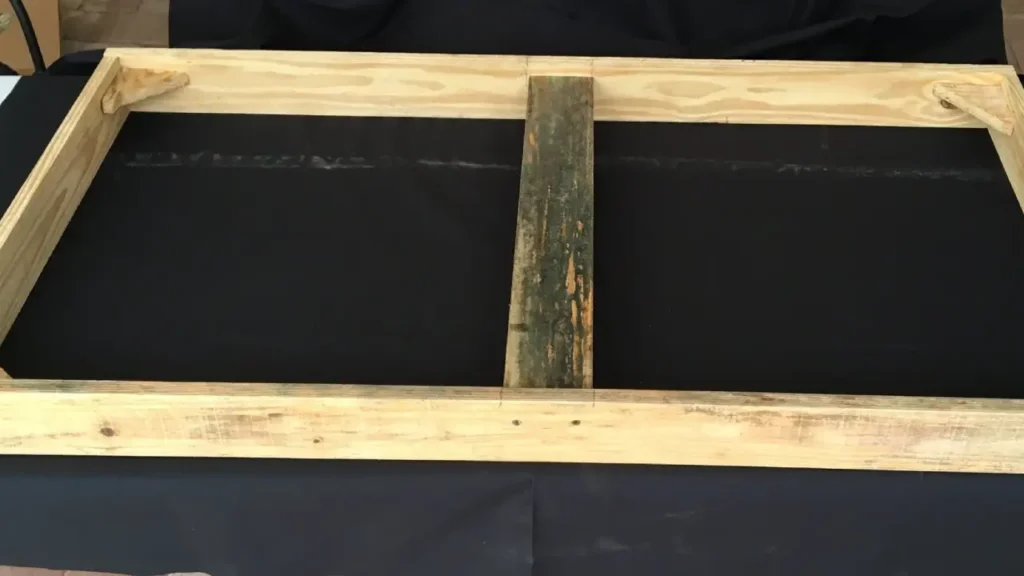
- Build the Frame: Cut the wood to the desired dimensions for your panel and assemble it into a rectangular frame using wood glue and nails or screws.
- Attach Acoustic Material: Cut your acoustic foam or mineral wool to fit inside the frame. Secure it in place with staples or adhesive.
- Cover with Fabric: Cut your fabric to slightly larger dimensions than the frame. Drape the fabric over the panel and staple it to the back of the frame, ensuring a tight fit.
- Finishing Touches: Trim any excess fabric and consider adding a hanging system (sawtooth hangers or picture frame hooks) to the back of the panel.
Tips:
- Thickness: Thicker panels generally offer better sound absorption.
- Material: Acoustic foam is often preferred for its affordability and ease of use, while mineral wool provides superior sound absorption.
- Fabric Choice: Opt for a breathable fabric to allow sound waves to reach the acoustic material.
- Placement: Experiment with different panel placements to optimize sound quality.
Additional Considerations:
- Bass Traps: For controlling low frequencies, consider building bass traps, which are typically larger and thicker than standard acoustic panels.
- Corner Traps: Placing acoustic panels in corners can help absorb low-frequency sound.
- Safety: Wear gloves and a mask when handling acoustic materials.
By following these steps and experimenting with different materials and placements, you can create effective acoustic panels to improve the sound quality in your space.
Acoustic Panel Construction

Acoustic panel construction involves the assembly of materials to create structures that effectively absorb sound waves. These panels are commonly used in various settings, including recording studios, home theaters, and offices, to improve acoustics and reduce noise.
Key Components of Acoustic Panel Construction:
- Base Material: The foundation of an acoustic panel is typically a rigid material like wood, MDF (Medium-Density Fiberboard), or particleboard. This base provides structural support and stability.
- Absorbent Material: This is the core component responsible for absorbing sound waves. Common materials include mineral wool, fiberglass, foam, and recycled materials. The choice of absorbent material depends on the desired level of sound absorption and other factors like environmental considerations.
- Covering Material: The covering material protects the absorbent material, adds aesthetics, and may also contribute to sound absorption. Options include fabric, wood veneer, or perforated metal.
- Framing: In some cases, a frame is used to provide additional support and shape to the panel. This can be made of wood, metal, or other suitable materials.
Construction Methods:
- Stapling: This is a common method where the absorbent material is stapled to the base material, and then the covering material is stapled on top.
- Gluing: The absorbent material can be glued to the base material, and the covering material can be glued or stapled on top.
- Clamping: For panels with a frame, the absorbent material can be clamped between the frame and the base material.
Factors Affecting Acoustic Panel Performance:
- Thickness: Thicker panels generally provide better sound absorption.
- Density: The density of the absorbent material affects its sound-absorbing properties.
- Material Type: Different materials have varying sound absorption characteristics.
- Panel Design: The design of the panel, including the shape and size, can influence its performance.
- Installation: Proper installation, including placement and orientation, is crucial for optimal results.
By understanding the key components, construction methods, and factors affecting performance, you can make informed decisions when building or purchasing acoustic panels for your specific needs.
Would you like to know more about specific types of acoustic panels or their applications?
How to Build Acoustic Panels for Your Home Studio?

Choosing Your Materials
For a home studio, you’ll likely want to focus on acoustic foam as your primary sound-absorbing material. It’s relatively inexpensive, easy to work with, and effective at reducing mid and high frequencies.
- Acoustic Foam: Choose a density of at least 2 pounds per cubic foot for optimal sound absorption. Wedge-shaped foam is often preferred for its ability to trap sound effectively.
- Wood: Use 1×2 or 1×3 inch lumber for the frame.
- Fabric: A breathable fabric like cotton or burlap is ideal for covering the panel.
- Adhesive: Use a strong spray adhesive to secure the foam to the frame.
Building Your Panels
- Measure and Cut: Determine the desired size of your panels based on your studio’s dimensions. Cut the wood for the frame accordingly.
- Assemble the Frame: Build a rectangular frame using the wood pieces and wood glue. Secure the joints with nails or screws.
- Attach Acoustic Foam: Cut the acoustic foam to fit inside the frame. Apply adhesive to the back of the foam and carefully place it inside the frame. Ensure it’s securely attached.
- Cover with Fabric: Cut the fabric slightly larger than the frame. Drape it over the panel and staple it to the back of the frame, ensuring a tight fit.
Placement and Additional Tips
- Identify problem areas: Determine where echoes and reverberation are most prominent in your studio.
- Target first reflection points: Place panels on the walls where sound directly bounces off your speakers.
- Consider bass traps: For controlling low frequencies, build larger panels or corner bass traps.
- Experiment: Try different panel placements to find the optimal configuration.
- Ventilation: Ensure proper ventilation in your studio to prevent moisture buildup.
Visual Guide:
Remember: This is a basic guide. For more complex acoustic treatments or larger studios, consulting with an acoustic professional might be beneficial.
How to Create Acoustic Panels?
Materials Needed:
- Wood: 1×2 or 1×3 inch lumber for the frame
- Acoustic foam: Choose a density suitable for your needs (2-6 pounds per cubic foot)
- Fabric: A breathable fabric like burlap or cotton
- Staple gun and staples
- Wood glue
- Saw
- Measuring tape
- Drill
Steps to Build Acoustic Panels:
- Determine Panel Size: Decide on the dimensions of your panels based on your room’s size and the area you want to cover.
- Construct the Frame: Cut the wood to the desired dimensions and assemble it into a rectangular frame using wood glue and nails or screws.
- Attach Acoustic Foam: Cut the acoustic foam to fit inside the frame. Secure it with staples or adhesive.
- Cover with Fabric: Cut the fabric slightly larger than the frame. Drape it over the panel and staple it to the back of the frame, ensuring a tight fit.
- Finishing Touches: Trim excess fabric and add hanging hardware (sawtooth hangers or picture frame hooks) to the back.
Tips for Optimal Results:
- Thickness: Thicker panels generally offer better sound absorption.
- Material: Experiment with different acoustic materials to find the best fit for your needs.
- Fabric Choice: Choose a breathable fabric to allow sound waves to pass through.
- Placement: Experiment with different panel placements to optimize sound quality.
- Ventilation: Ensure proper ventilation to prevent moisture buildup.
Additional Considerations:
- Bass Traps: For controlling low frequencies, consider building larger panels or corner bass traps.
- Professional Help: If you’re dealing with complex acoustic challenges, consult an acoustic engineer.
By following these steps and considering your specific needs, you can create effective acoustic panels to improve the sound quality in your space.
Would you like more specific guidance based on your room’s size or the type of sound you’re trying to improve?
Conclusion
Building your own acoustic panels can be a rewarding DIY project that significantly improves your room’s acoustics. By following these steps and experimenting with different materials and placements, you can create a space that is optimized for listening, recording, or simply enjoying a quieter environment. Remember, patience and attention to detail are key to achieving optimal results.
Don’t have the time or resources to build your own panels?
Let us handle the hard work! We offer high-quality, affordable acoustic panels in a variety of sizes and materials. Contact us today for a quote and discover how our products can transform your space.