Acoustic Panel screws
Acoustic panel screws are specialized fasteners designed to securely attach acoustic panels to walls, ceilings, or other surfaces without compromising their sound-absorbing properties. These screws are typically made from materials like stainless steel or aluminum, which are both durable and resistant to corrosion.
Get Our Acoustic Panel screws for acoustic panel installation
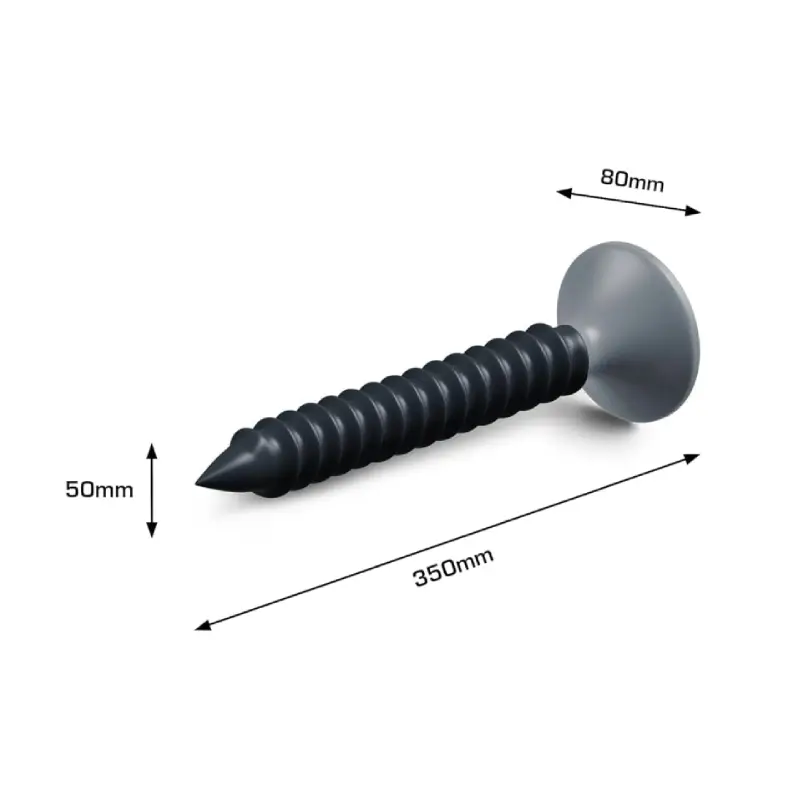
Ensure a secure and effective installation of your acoustic panels with our high-quality screws. Our screws are made from premium materials, feature a fine thread pitch for a secure grip, and are designed to resist rust and corrosion. They are compatible with standard tools and offer a hassle-free installation process.
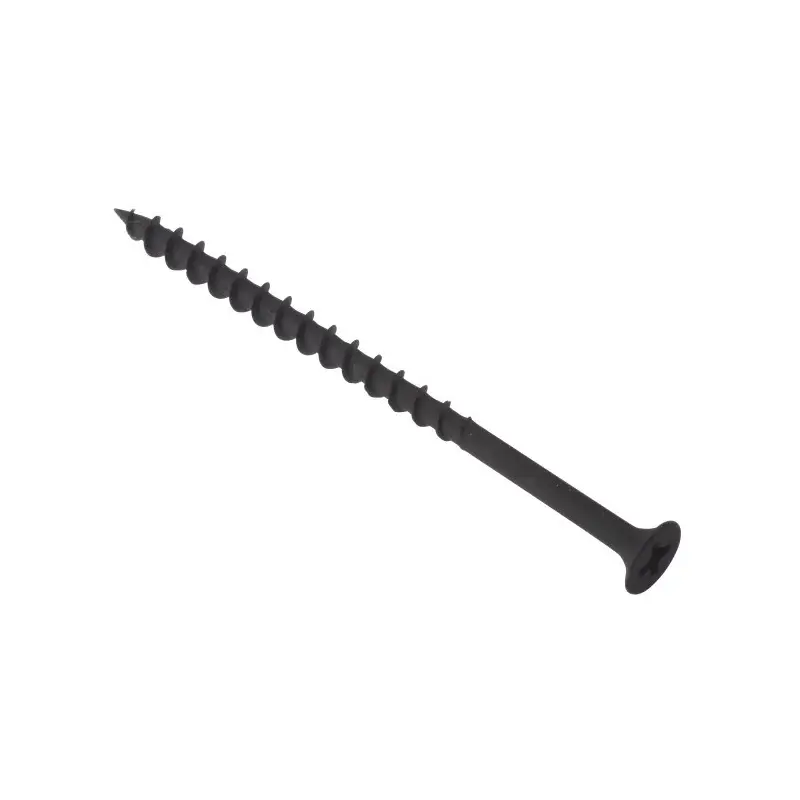
Black Phosphate Acoustic Panel Screws
Our black phosphate acoustic panel screws offer a durable and aesthetically pleasing solution for securing your acoustic panels. These screws are coated with a black phosphate finish that provides excellent corrosion resistance and a sleek appearance. They are designed to provide a secure grip without compromising the integrity of your acoustic panels. Ideal for both residential and commercial applications.
custom acoustic panel screws
Are you looking for acoustic panel screws that are specifically designed to meet your unique requirements? We offer custom acoustic panel screws that can be tailored to match your project’s specifications, ensuring a perfect fit and optimal performance.
Installation screws for acoustic panels
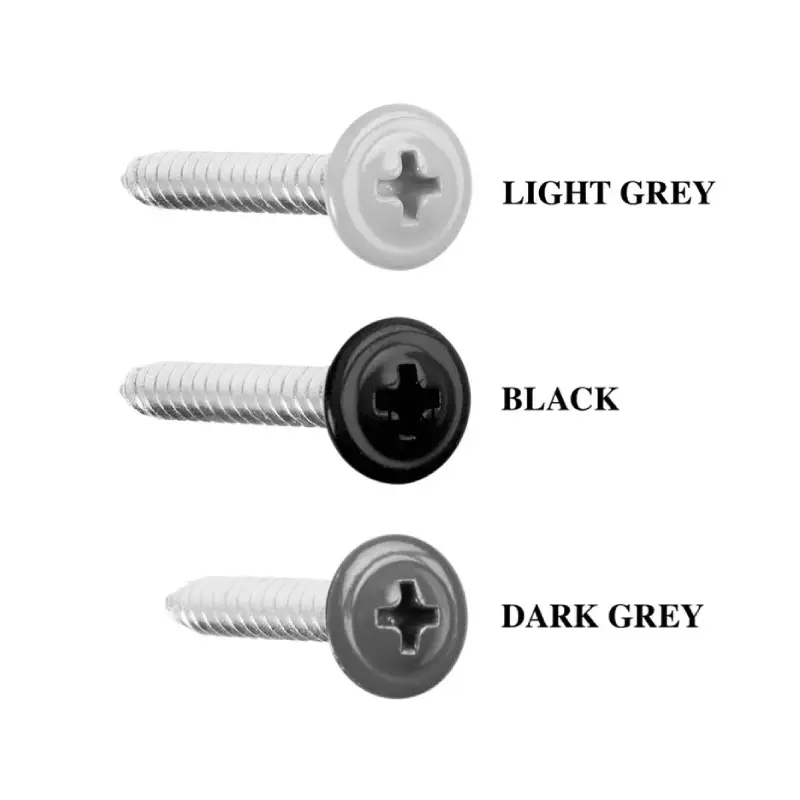
Enhance your acoustic panel installation with our high-quality screws. Available in a variety of colors to match your interior design, these screws offer a secure and discreet way to attach your panels. Our screws are made from durable materials and are designed to provide a long-lasting and reliable connection.
different screw types

Head Types
- Flathead: A flat, countersunk head that sits flush with the surface when driven.
- Phillips: A cross-shaped head that requires a Phillips screwdriver for installation.
- Slotted: A flat-bladed head that requires a flat-head screwdriver for installation.
- Hex Head: A hexagonal head that requires a hex key or Allen wrench for installation.
- Torx: A star-shaped head that requires a Torx driver for installation.
- Pan Head: A round, slightly raised head with a countersunk underside.
Thread Types
- Full Thread: Threads extend the entire length of the screw.
- Partial Thread: Threads are present only on the upper portion of the screw.
- Self-Tapping: Threads are cut into the material as the screw is driven.
Drive Types
- Phillips: A cross-shaped drive that requires a Phillips screwdriver.
- Slotted: A flat-bladed drive that requires a flat-head screwdriver.
- Hex: A hexagonal drive that requires a hex key or Allen wrench.
- Torx: A star-shaped drive that requires a Torx driver.
- Pozidriv: A cross-shaped drive that is similar to Phillips but has additional grooves for improved grip.
Other Types
- Machine Screws: General-purpose screws used in various applications.
- Wood Screws: Designed for use in wood, with a sharp point and coarse threads.
- Sheet Metal Screws: Designed for use in thin metal sheets, with a sharp point and fine threads.
- Lag Screws: Large, heavy-duty screws used for structural applications.
- Tap Screws: Self-tapping screws with a wider shank and a cutting edge.
FAQs about Acoustic Panel Screws
what are acoustic panel screws?
Acoustic panel screws are specialized fasteners designed to securely attach acoustic panels to walls, ceilings, or other surfaces without compromising their sound-absorbing properties.
These screws are typically made from materials like stainless steel or aluminum, which are both durable and resistant to corrosion.
How to Use Screw for Acoustic Panels?
Screws are a common method for securely attaching acoustic panels to walls, ceilings, or other surfaces. Here are some general guidelines for using screws with acoustic panels:
1. Choose the Right Screws:
- Size: Select screws that are long enough to penetrate the acoustic panel and securely fasten it to the underlying surface.
- Material: Opt for screws made from materials like stainless steel or aluminum, which are both durable and resistant to corrosion.
- Thread Type: Consider using self-tapping screws, which can cut their own threads into the material, making installation easier.
2. Prepare the Surface:
- Ensure the surface is clean and free of any debris or obstructions.
- If necessary, drill pilot holes slightly smaller than the diameter of the screws to prevent the material from splitting.
3. Position the Acoustic Panel:
- Align the panel with the desired location.
- Ensure the panel is level and properly positioned.
4. Mark the Screw Locations:
- Use a pencil or marker to mark the locations where you will insert the screws.
- Make sure the screws are spaced evenly and according to the manufacturer‘s recommendations.
5. Insert the Screws:
- Drive the screws into the marked locations using a screwdriver or an electric drill.
- Be careful not to overtighten the screws, as this can damage the acoustic panel or the underlying surface.
6. Verify the Installation:
- Check that the acoustic panel is securely attached and does not wobble or move.
- Ensure the screws are flush with the surface of the panel.
Additional Tips:
- Use washers: Adding washers between the screws and the acoustic panel can help distribute the load and prevent the screws from sinking into the material.
- Consider using a stud finder: If you are attaching the panels to a wall, using a stud finder to locate the studs can ensure that the screws are securely anchored.
By following these guidelines, you can effectively use screws to install your acoustic panels and create a quieter, more acoustically treated environment.
What screws to use for acoustic panels?
The best screws to use for acoustic panels are those specifically designed for this purpose.
These screws are typically made from stainless steel or aluminum, which are both durable and resistant to corrosion. They also have a fine thread pitch and a flat or countersunk head to ensure a secure and discreet installation.
Here are some additional factors to consider when choosing screws for acoustic panels:
- Panel thickness: The screws should be long enough to penetrate the panel and securely attach it to the underlying surface.
- Surface material: The type of surface you’re attaching the panels to will influence the screw length and type.
- Screw type: Choose screws that are compatible with your acoustic panels and the desired finish.
- Load capacity: Make sure the screws can handle the weight of the acoustic panels without bending or breaking.
It’s also a good idea to consult with the manufacturer of your acoustic panels for specific recommendations on screw type and size.
By selecting the appropriate screws and following proper installation techniques, you can ensure that your acoustic panels are securely attached and provide optimal sound absorption.
What is the best way to mount acoustic panels?
There are several ways to mount acoustic panels, each with its own advantages and disadvantages:
- Adhesive: This is the easiest method and requires no tools. Simply apply a layer of adhesive to the back of the panel and press it firmly against the wall. However, this method may not be suitable for heavy panels or for surfaces that are difficult to clean.
- Screws: This is a more secure method that is suitable for most types of walls. Drill pilot holes in the wall and then screw the panel into place. This method may require some tools and can be more time-consuming than using adhesive.
- Command strips: These are double-sided adhesive strips that can be used to hang lightweight panels without damaging the wall. They are easy to apply and remove, making them a good option for renters or those who want to avoid making permanent changes to their walls.
- Hangers: This method is typically used for larger panels or heavy panels. Hangers can be attached to the wall and then used to hang the panels from them. This method requires some tools and can be more complex to install than other methods.
The best way to mount acoustic panels will depend on the type of panels you have, the surface you are mounting them on, and your own personal preferences. It is important to choose a method that is both secure and appropriate for your specific situation.
Here are some additional tips for mounting acoustic panels:
- Measure the area where you will be mounting the panels carefully. This will help you ensure that you have enough panels to cover the area and that they will fit properly.
- Plan the layout of the panels before you start installing them. This will help you ensure that they are evenly spaced and that they will create the desired acoustic effect.
- If you are using adhesive, be sure to allow the adhesive to dry completely before hanging the panels.
- If you are using screws, make sure to tighten them securely but not too tightly. Overtightening the screws can damage the panels or the wall.
- Once the panels are installed, take some time to test the acoustics in the room and make any adjustments as needed.
By following these tips, you can ensure that your acoustic panels are properly mounted and provide the desired sound absorption benefits.
Can you use nails for acoustic panels?
Generally, it’s not recommended to use nails for acoustic panels.
Nails can penetrate the acoustic material, potentially damaging its sound-absorbing properties. They can also create visible holes in the panels, which can affect their aesthetic appearance.
If you need to secure acoustic panels to a surface, it’s best to use screws designed for this purpose. These screws are typically made from materials like stainless steel or aluminum, which are both durable and resistant to corrosion. They also have a fine thread pitch and a flat or countersunk head to ensure a secure and discreet installation.
By using screws instead of nails, you can maintain the integrity of your acoustic panels and ensure optimal sound absorption.
Should acoustic panels be hung vertically or horizontally?
The orientation of acoustic panels (vertically or horizontally) can impact their effectiveness in certain situations, but it’s generally not a strict rule.
Here are some factors to consider when deciding:
- Frequency Range: For low-frequency sound absorption, vertical panels might be more effective. However, for a wider range of frequencies, including mid- and high-frequencies, horizontal panels can also be beneficial.
- Room Acoustics: The specific acoustics of your room can influence the optimal orientation. For example, if you have a lot of parallel surfaces that cause reflections, horizontal panels might help to break up those reflections.
- Aesthetic Preferences: The desired look of your room can also play a role. Both vertical and horizontal orientations can create different visual effects.
In many cases, a combination of vertical and horizontal panels can provide the best overall sound absorption and aesthetic appeal. It’s often recommended to experiment with different arrangements to find the configuration that works best for your specific room and needs.